| |
ABOUT
THE HOBBY
APRS
HLOG
RESOURCES
HOWTO
PROJECTS
FOLLOWING
FOR SALE
CONTACT
|
|
Background:
I recently became a HAM (08/18/2009) and purchased a Yaesu/Vertex VX-150 HT. It is capable of transmitting on the 2 Meter band. Soon after I purchased it, I began tuning into random frequencies to primarily listen to anything that the HT picked up. Before long I began hearing "chatter" about some folks attempting to use the 'handie-talkies' with their rubber duckie antennas and with little success at long range transmissions.
I soon learned that, maybe, I needed to buy an antenna to place on the roof of my car while mobile and attach it to the HT for better transmission and reception. I bought one and what a world of difference it made!
Problem:
I began removing the magnet mount antenna I just bought from car and placed it on a saw horse just 15 feet away from the back window of my studio. I fed the cable through the window and began using the HT from home as well. When I went somewhere in the car, I took the antenna and walked it to the car, fed the cable and presto! Mobile again... When I returned home, out came the antenna from the car, back to the saw horse outside my window... After three days of this back and forth action, I realized that there had to be a better way to solve this problem of mine: "I need a permanent external antenna for the house."
The "Droopy Groundplane" antenna is a 2 Meter/440MHz capable antenna. It is also easy to build and it takes just a few items to get it done. I relied solely upon other people's work and calculations found on the Internet for this project. The major driving force here to accomplish this project was the need for an external antenna to allow me to use my HT as a home base station.
|
Solution:
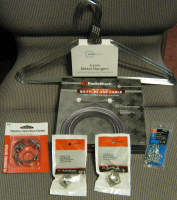
I set out to find one SO-239 chassis mount socket, which is the center piece of this antenna. I found two at a local Radio Shack store and bought both of them. I also bought 50 feet of PL-259 Male/Male pre-made cable, some wire coat hangers, a hose clamp and some #6 machine screws and matching nuts. After buying those items, I realized that I would need to place this external antenna on some sort of pole. I initially bought 3 x 10 foot lengths of conduit and planned on lifting the antenna from the ground. The more I thought about how to mount the antenna the more I was inclined to using less pipe, since the antenna itself is extrememly light weight.
I decided to simply buy two 'L' brackets, two 3/4" pipe U bolts and a 3 foot length of 3/4" PVC pipe.
|
|
I built the antenna per instructions on the Net. I cut the vertical element using one of the wire coat hangers to exactly 19 5/16" and soldered it to the center, insulated post of the SO-239. I then cut four more wires to the length of 20 3/16". These are the radials. The trick here is to make loops on one end of each of the radials so that they can be bolted to the SO-239 and bent BEFORE you cut the wires to the specified length.
NOTE: The lengths specified here are based on calculations made to satisfy a 1:1 SWR ratio at 146MHz.
|
|
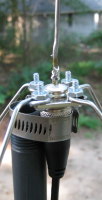
I, then, took the four radials and bolted them to the SO-239 socket. Once they were bolted down, I measured and cut to length. Once cut, I carefully bent each radial down to approximately 45 degrees. In this picture, you can see how the pieces fit together. I quickly connected one end of the 50 foot 50 ohm cable to the SO-239 and hooked up my HT on the other end to test it on the saw horse.
Notice how I used a hose clamp to simply anchor the antenna to the PVC pipe. Easy! :-)
I quickly tuned into the local repeater in the area and I made my first contact with my newly handmade antenna!!! I contacted KI4VCJ and he was kind enough to give me feddback on the antenna's performance. Soon after that, I began wondering how I was going to mount this anteann permanently.
|
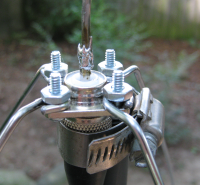
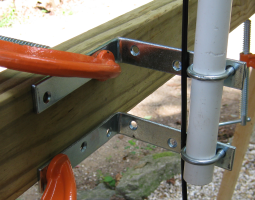
After a quick lunch and some thoughtful thoughts I decided to use the two 'L' brackets and U bolts. I had to drill a hole on each bracket to match the width of the U bolts before clamping down the PVC pipe to them.
|
|


|
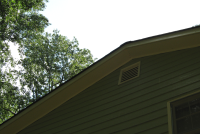
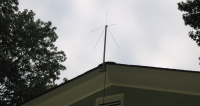
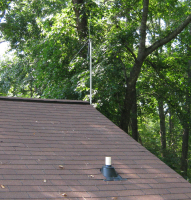
OK, so I have an antenna at this time. It's got to go to the roof! I took 6 2" wood screws, my electric drill with a phillips tip on it and the antenna and climbed on to the roof. As carefully as I could be, I managed to bolt down the antenna by holding it with one hand as I drilled in the wood screws one by one. Lastly, I slowly lowered the 50 foot cable straight down and fed it through my studio window.
I climbed back down from the roof, hurried into the kitchen and grabbed a tall glass of Southern Sweetened Iced Tea and sat at my desk. The moment of truth is upon us now!!! I turned the radio on after connecting the antenna wire to the HT and tuned into the local repeater.
|
|
|
I announced my call letters and W1CRM heard me. He was kind enough to help me test and provide feedback on the newly installed antenna. It seems that it is working great! :-) He also provided me with a few more repeaters to add to my HT's memory to tune into for the surrounding areas from my house.
So there you have it! I have successfully created a 2 meter antenna and is fully operational!!!
73's to all! :-)
|
|
|


